FlexPLA, this new experimental stuff for your FDM 3D printer is a revolutionary new rubber-like 3D printer filament which allows you to 3D print flexible objects, such as rubber machine parts, soft toys, flip-flops, and other rubbery items like silicone parts. PLA is an organic plastic extracted from corn and it is 100% biodegradable so it has less of an impact on the environment. At this time, FlexPLA is only manufactured in the Netherlands. I’ve ordered a spool from the dutch manufacturer to be able to test the 1.75 mm diameter version on my desktop 3D printer.
I really like PLA because it is really environmental-friendly, and if there will be a new industrial revolution as told, I won’t be happy if we would fulfill our planet with 3D printed ABS junk. I’ve already written about the sustainability of 3D printing with biodegradable materials like PLA or 3D printing with wood, but there is a huge amount of articles based on the eco-friendly 3D printing materials researches. This type of 3D printing material has a much lesser carbon footprint than typical co-polyester 3D printer filaments. This flexible PLA filament offers up to 50% lower carbon footprint than traditional co-polyester materials. Next to this, the complete process from sourcing the chemical recipe to the actual extruding of the filament is being done in the Netherlands. This reduces the “travel distance” of this material significantly, meaning that less fossil fuels are being used to get this material into my studio.
PLA is Poly-Lactic-Acid, a biodegradable polymer that has a lower melting point compared to ABS, you have to mind this when adjusting the temperature of the hot end. The manufacturer suggests to 3D print with flexible PLA at 230 C for the best results. At this point, I have to clear something. It is really important which type of thermometer you use. Some 3D printers have a built-in laser thermometer, and most desktop FDM printers have an infrared sensor for measuring the temperature. IR thermometers measure heater temp, the laser versions are capable to measure the nuzzle temp. Thus the 30 C difference between what is recommended and what laser users can 3D print at.
Experimenting with new materials while 3D printing is a dangerous business. I’ve already destroyed a nozzle while experimenting with 3D printing with wood, and I had to replace my complete hot end a couple of weeks ago because of some filament diameter issues. One thing you should do is keep your faith alive, and keep trying. Don’t put deadlines; deadlines will eventually kill your creativity. Be patient. Exploring new ways of additive fabrication techniques does take a little time to perfect it. I’m not a pro, but I keep learning every day. One thing you should do is keep your faith alive, and keep trying.
So, when I finally got my spool of FlexPLA 1.75 filament for my Makerbot Replicator 2 desktop 3D printer I was so excited, this type of material has been only available for professional DLP 3D printers and some types of SLS 3D printers with elastic polyamide powder. I’ve put the spool on the spool holder and wanted to load the filament into the plunger and set out to print my first sex toy (kidding) but ran into problems. So I had to tweak around with my desktop 3D printer settings and I decided to share my experiences with you.
It is highly recommended to lower your printing speed (compared to 3D printing with normal PLA) when 3D printing with FlexPLA flexible experimental 3D printing filament. My advice for an optimal 3D printing temperature in the extruder is to print at approximately 220° C. Please do keep in mind that above are only guidelines and that every desktop 3D printer requires different settings for getting the wanted optimal 3D printing results and fine surface finishes of the 3D printed objects.
Well, let’s see the results of my experiments. I’ve started with some simple models to calibrate my desktop 3D printer and test it how it 3D prints with this new type of material. I’ve adjusted the extruder head’s temperature, the extrusion and traveling speeds of the tool and the retraction values as well. I’ve chosen a nozzle with .4 mm diameter for the first test, I’m going to give it a try with the .3 mm and .5 mm nozzles as well. If you don’t have nozzles in several sizes, you can drill your original, but be careful, you can easily destroy the nozzle (like I did a couple of weeks before) and with a damaged tip, your nozzle will be useless.
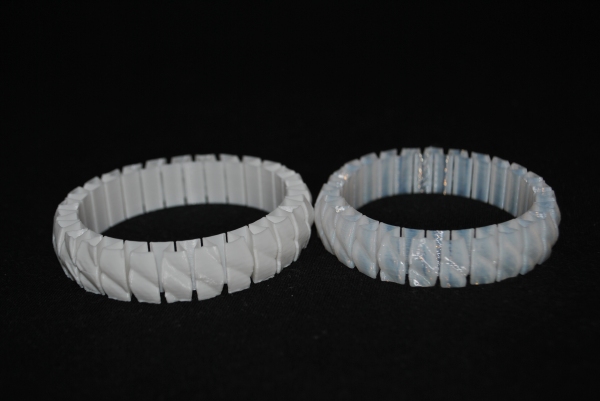
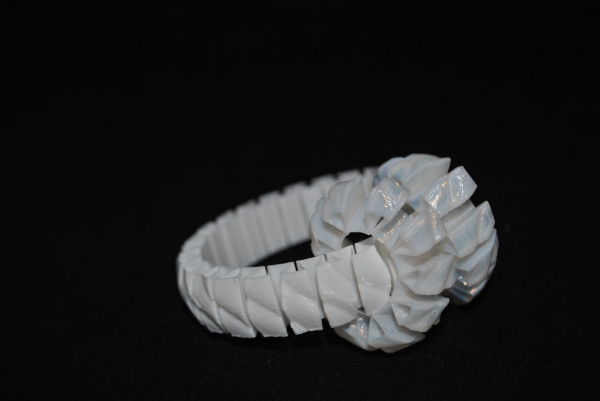
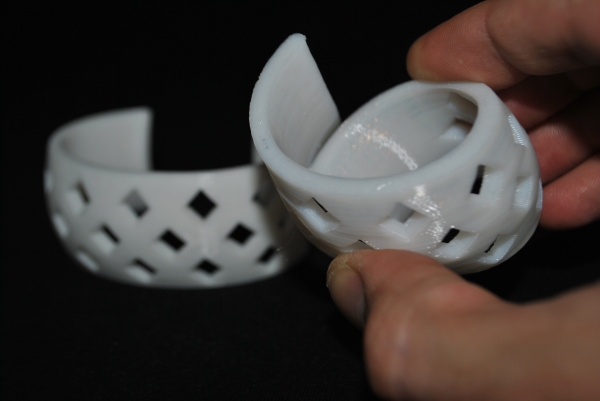
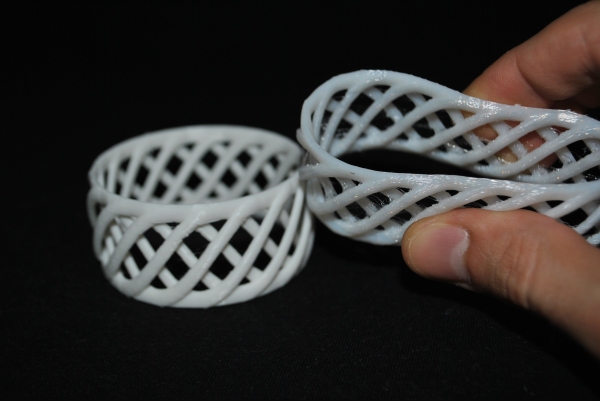
My first object which I’ve 3D printed with FlexPLA was the bracelet called ‘strechlet’, a free .stl which you can download from Thingiverse (and it was included on the SD card delivered with the MakerBot Replicator2 as well). It is already a flexible structure which is stretchy even if 3D printed with rigid PLA. It came out in 10 minutes with FlexPLA, and I also printed it from normal PLA just for the comparison. The normal PLA has a different color, it’s more ‘frosty’ and honestly, I prefer this kind of white instead of the glossy/shiny/jelly finish of the flexible version.
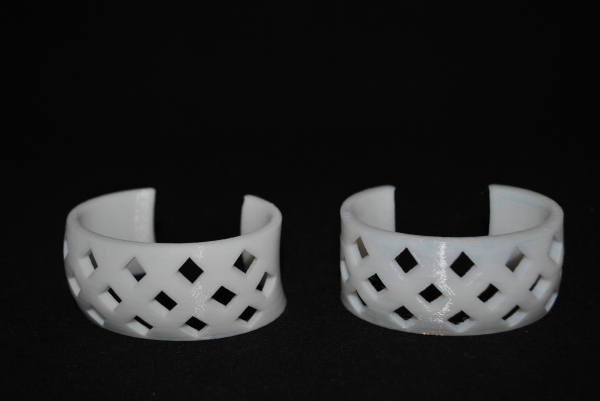
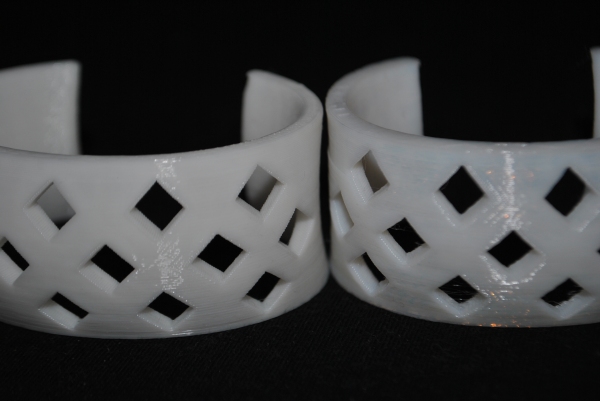
After that, I wanted to see how holes and horizontal bridges can 3D print with this material. I’ve hosen the diagrid bracelet, which I already made from normal PLA (white) and with wood as well. In this case, there isn’t any huge difference in the color, because of the thickness of the structure. So, if you want to 3D print really white objects with that new FlexPLA filament, you have to choose a fat wall-thickness for your model, in other case, your walls would be some kind of translucent. The holes came out pretty fine, the filament acts very similar to the rigid version. I was afraid, because Laywood cannot function for holes or bridges because of the stickiness of the polymer used as bound material for the saw dust.
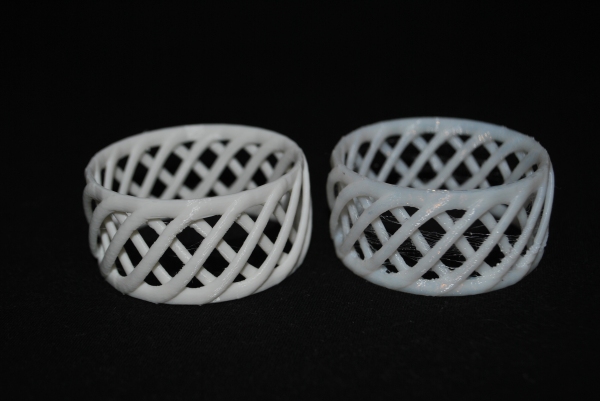
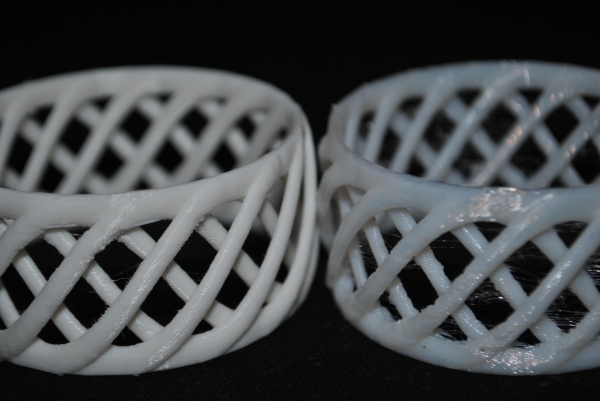
And what about tiny, thick structures or columns? Do they stand the 3D printing process? Let’s see my next test for that. I’ve 3D printed a bracelet, which has some really skinny bended rods. Of course, I made it from normal PLA as well, I wanted to see the difference. It came out really nice, as you can see it on this video I’ve made (sorry for the quality, I only had my phone), on the macro shot, you can see some differences in the finish, but I feel satisfied at all with the results. And it is really flexible! It will fit for any size of hands, you don’t have to be afraid of breaking it, just stretch it!
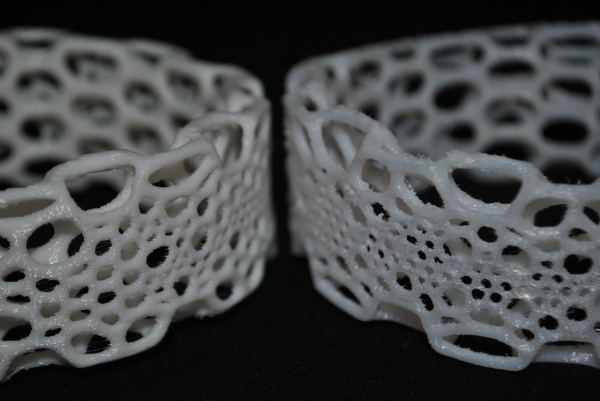
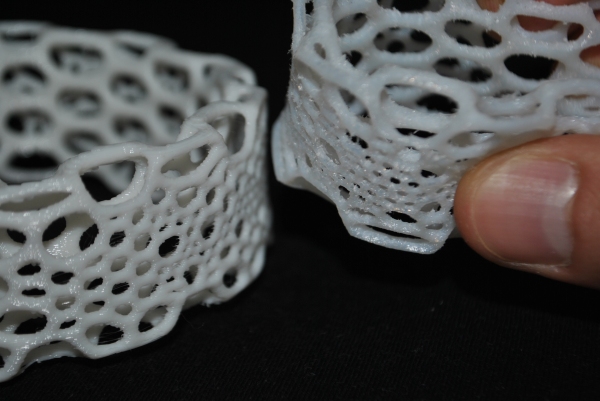
My last key point was the 3D printing of support structures, and how to remove them from the 3D printed model. I’ve selected a beautiful model with some chiseled details, so I already can check the resolution as well. The model is designed by Jessice from Nervous System, and it is a bracelet again. I’ve printed it with 100 microns layer height and 100 mm/s extrusion speed at 240 C. The rigid PLA version on the left has been 3D printed with 270 micron layer height without supports, the FlexPLA version has been 3D printed with rafts and supports. It took about 7 hours until it came out, on the free surfaces, it has got a really smooth and fine finish. But those supports, err… It has been a nightmare to remove them. All the fibred act like rubber, and they still stick to the model. If I want to remove them, the whole objects stretches and I was afraid that I broke the swag. It took about 3 hrs to remove the most of the support structures, but the surface turned into a greasy something after removing the support structures. You can see it on your pics, it looks ok, but it would be much better without supports. The next time, I’m going to do some tests without support structures to see how far I can push the technical boundaries of this cool material!
I hope you liked this post and want to try this new experimental material as well! In the future, I want to 3D print some wearables (shoes for example!) with flexible material, so stay tuned, some new design concept are coming;) peace


Hello, thank you for the post, it’s very useful. Do you know where I could also buy a kilo of FlexPla to try it? Thank you!
Hi Fred, glad you liked my article and thanks for stopping by and leaving a comment. I’ve ordered my second spool from the dutch company Formfutura, their FlexPLA is really good but I had some serious issues with their normal PLA filaments diameter.
Hello, thank you for the answer! I’m going to try it!
Pingback: 3D printing with flexible materials – Fle...
Pingback: 3D nyomtatás otthon speciális anyagokkal | parametric | art
Wow! I am amazed at your vision and art. I am from California and would love to incorporate your ideas in my vision for the future through my device. I 100% agree with your thoughts and know your headed the right direction. What else have you come up with since this posting? Can you potentially make your own PLA at home and use an extruder to make sculpture? I am very interested! Thanks you for your inspiration!
Temoor
Hi! Sorry for the late reply, I’ve just seen your comment. Actually I’m working on a DIY plastic extruder so I could recycle my failed 3D prints and turn ’em into plastic filament again, I’m going to post about it as soon as it’s functional! Thanks for stopping by and leaving a comment! best, Peter
Great. Please keep us posted as this would be awesome. Have you ever tried making our own bioplastics?
Unfortunately I have no idea how to do that, but I’ve just contacted a chemical engineer who is a PLA expert! I hope I can go on with the experiments soon…
Nice experiment. What I like most about PLA filament aside from being flexible is its environment friendly properties. PLA is both commercially 100% compostable and 100% biodegradable. I’m planning to do some experiment with it as soon as my order arrives. Anyways, fred and algorithmicart, I recommend 3D2print for normal PLA filaments. So far, I have no issues with the diameter and bed surface requirements (just be careful not to drive your nozzle into your bed though).
Great article! Are you the author of the pictures? Can I use one of them for a book I’m working on? Please email me.
Hi Mathilde, yes, I’m the author of all the pictures I publish on my blog. You can use ’em for your book with attribution the my blog, feel free to keep me updated about the book!
Pingback: Flexibele broodrooster | Ecodesign – Stefanie De Samblanx